
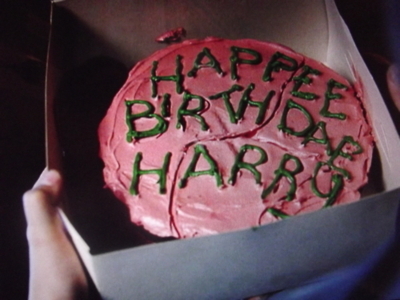
“‘Anyway – Harry,’ said the giant, turning his back on the Dursleys, ‘a very happy birthday to yeh. Got summat her yeh here – I mighta sat on it at some point, but it’ll taste all right.’
From an inside pocket of his black overcoat he pulled a slightly squashed box. Harry opened it with trembling fingers. Inside was a large, sticky chocolate cake with Happy Birthday Harry written on it in green icing” (Rowling, 1997, p. 40).
The first food item from the Harry Potter series that I have chose to make is the birthday cake that Hagrid made for Harry in Harry Potter and the Philosopher’s Stone. There are comprehensive recipes and directions such as those found here, but I chose to forgo those and combine several different recipes to make my very own Happee Birthdae Harry cake.
I imagine that Hagrid’s cooking skills wouldn’t be the most elborate. For this reason, I looked for a very simple chocolate cake recipe that is still made from scratch. This recipe is simple, delicious, and uses only one bowl:
INGREDIENTS
- 2 cups white sugar
- 1 3/4 cups all-purpose flour
- 3/4 cup unsweetened cocoa powder
- 1 1/2 teaspoons baking powder
- 1 1/2 teaspoons baking soda
- 1 teaspoon salt
- 2 eggs
- 1 cup milk
- 1/2 cup vegetable oil
- 2 teaspoons vanilla extract
- 1 cup boiling water
INSTRUCTIONS
- Preheat oven to 350° F. Prepare two 8″ or 9″ round pans (or I’ve also used a 9″x13″ sheet cake pan). You can either grease and flour the pans, use non-stick cooking spray, or use homemade cake pan release.
- In a large mixing bowl, mix together the sugar, flour, cocoa, baking powder, baking soda and salt.
- Make a well in the center of the dry ingredients and add the eggs, oil, milk and vanilla. Beat for 2 minutes at medium speed, then stir in the boiling water.
- Pour into the prepared pans and bake for 30-35 minutes, or until a toothpick comes out clean. Allow them to cool for 10 minutes in the pan, then flip them out on a wire rack and let completely cool before frosting.
I followed these directons to a T and the cake came out perfect. I was a bit hesistant on step 3 where it says to just make a well into the dry ingredients and add the eggs, oil, milk, and vanilla, but I did it and it worked well. I will be making this my #1 chocolate cake recipe from now on.


After letting the cake cool, it was ready for icing. For the inside layer of frosting between each layer of cake, I chose to do a brown sugar icing because I think it is delicious and goes well with chocolate cake. This is the recipe I used for this. I made the icing and then spread about 1/3 of it on top of one of the cakes and placed the other one top.
Frosting
- 1/2 cup butter
- 1 cup packed brown sugar
- 1/4 cup milk
- 2 cups powdered sugar
(I added a teaspoon of vanilla and a pinch of salt to this as well)
Steps
1. In 2-quart saucepan, melt butter over medium heat. Stir in brown sugar. Heat to boiling, stirring constantly. Reduce heat to low; boil and stir 2 minutes. Stir in milk; return to boiling. Remove from heat. Cool to lukewarm, about 30 minutes.
2. Gradually stir powdered sugar into brown sugar mixture. Place saucepan of frosting in bowl of cold water; beat with spoon until smooth and spreadable. If frosting becomes too stiff, stir in additional milk, 1 teaspoon at a time, or heat over low heat, stirring constantly.
-I used my mix master to beat the icing very smooth instead of just mixing with a spoon. A hand mixer can be used to achieve the same results as well
-Make sure that the cakes have been levelled off before icing them.
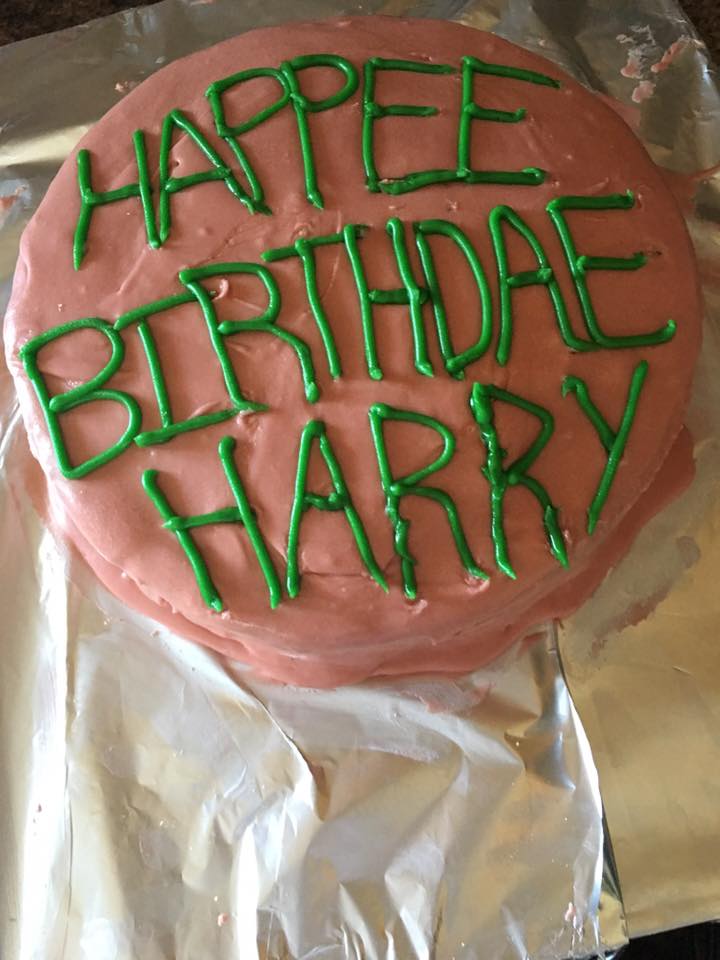
I decided I wanted to stick with a brown sugar icing for the outside of the cake too but the leftover frosting was too brown from the sugar to make it the orange colour from the movie. With the leftover 2/3 of the brown sugar icing, I added about 1/4 cup of milk and another cup or so of icing sugar. This made the icing a lighter colour. I then used red, yellow, and pink food colouring to make the icing the perfect shade of pinky orange. I spread this over the cake. The best part of icing this cake is that it’s supposed to look like a half giant/ wizard made it. Don’t worry about icing it perfectly.
Lastly, I needed to ice the words onto the cake. Here, I was conflicted because the wording in the move is “Happee Birthdae Harry” while the true spelling from the book is “Happy Birthday Harry.” I chose to use the movie’s spelling because I wanted the cake to look like the one from the movie. To ice the letters, I used a store boughten Cake Mate icing tube with one of the ends from the same brand that can be bought for it. 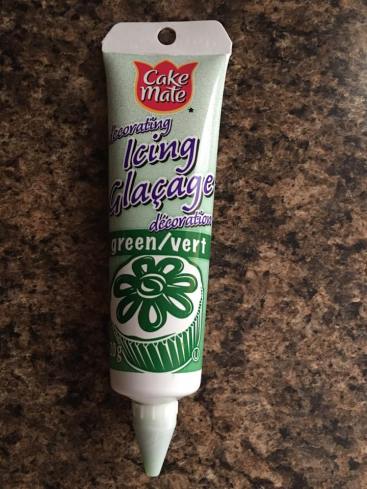
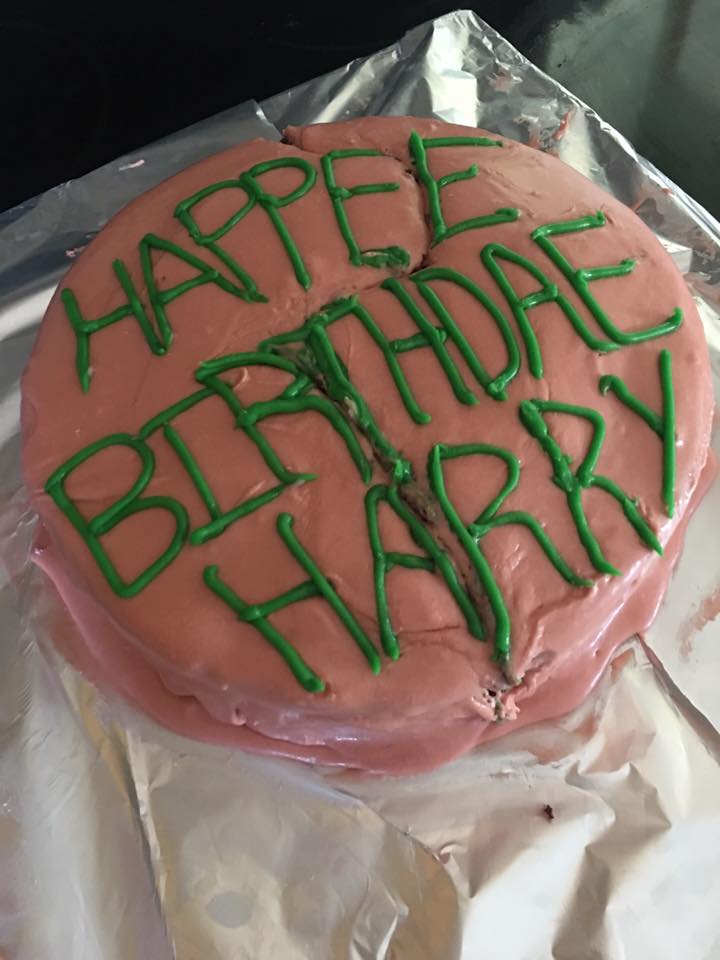
Here is the cake after completing the lettering. All I had left to do after this is cut the cake ridiculously through the center in a curving line and Voila!

This is amazing!!! 😀 I love Harry Potter!!! You did an excellent job at recreating Harry’s Birthday cake from Hagrid. I can’t wait to see what you make next!
LikeLiked by 1 person
This is magical. The connection to Harry Potter really brought me into your blog post and kept me there. Bringing a theme to your baking really sets you apart/makes your post super original — which is also a mark of a great teacher. Relating to students and making the ordinary extraordinary is a huge part of student engagement. I can just imagine what your Numeracy or Literacy lessons will look like after seeing how you transformed baking. Great work!
I also tried to bring a movie/television theme to my Learning Project. I am painting cartoon characters instead of the typical trees, mountains, and landscapes. Good luck with your learning. I look forward to the next post.
LikeLiked by 1 person
Stacey, a one bowl cake is always a bonus. A First Hogwarts problem – which spelling to use?
Yummy. Did this cake make it to an event – like a birthday party?
LikeLike
Hi Tanya! This cake did not make it to an event.. I ate the majority of it hahaha
LikeLike
Lucky you. 😀
LikeLike